
Watering New Sod
30 Day Watering Plan for New Sod: Sprinkler Run Times for Homeowners
Soak new sod within 30 minutes of installation, then keep it and the top inch of soil continuously moist for the first week with two to three short waterings a day. Over weeks two through four, water less often but longer, pushing moisture deeper into the soil. By day 30, most lawns are ready for the standard deep, infrequent schedule of about 1 to 1.5 inches a week, split across one or two sessions.
TL;DR:
- New sod needs to be soaked within 30 minutes of installation, covering the top two to three inches of soil to prevent drying out.
- During the first week, water two to three times daily with short cycles, keeping the surface moist, not soaked, to support root mat formation.
- After two weeks, water once or twice daily but deeper, reaching 1.5 to 2 inches in the soil to encourage root growth downward.
- By days 22 to 30, most lawns can transition to one or two deep watering sessions per week, achieving the standard 1 to 1.5 inches weekly for mature turf.
- To accurately water, measure sprinkler application rate with cans, adjust run times based on head type, and tailor schedules for soil type, heat, and slope to prevent overwatering or underwatering.
Table of Contents
- How Often Should You Water New Sod in the First 30 Days?
- How Do You Convert Watering Inches Into Sprinkler Run Times?
- Adjusting the Schedule for Your Soil, Heat, and Slope
- What Are the Signs of Overwatering or Underwatering New Sod?
- How Do You Check if New Sod Has Enough Water?
- Why Roberto Trusts Hands-On Checks Over Guesswork
- What the 30-Day Schedule Gets Right, and Where Homeowners Still Trip Up
- Get Sod Installed Right the First Time
- Sources
- FAQ
How Often Should You Water New Sod in the First 30 Days?
Sod does not have roots yet. It has a root mat that was sliced from a field a day or two before it landed in your yard, and it needs constant surface moisture just to survive until real roots grow down into your soil. That is why the first month looks nothing like normal lawn watering, and why treating new sod like an established lawn is the single biggest reason installations fail.
Here is the practical breakdown, broken into the stages your sod actually goes through.
Day 0: the first soak
Water within 30 minutes of the sod hitting the ground. Don’t wait until “later today.” Freshly cut sod dries out fast, especially on a warm afternoon, and the goal on day one is to wet the sod itself plus the top 2 to 3 inches of the soil underneath it. Most guides put that initial application at roughly 0.75 to 1 inch of water, enough that when you lift a corner, the soil beneath looks dark and feels genuinely wet, not just damp on the surface.
Days 1 through 7: short, frequent cycles
This is the phase homeowners get wrong most often, usually by watering too little. For the first week, run two to three short cycles a day, typically early morning, midday, and late afternoon, keeping the sod mat and the top half inch to inch of soil consistently moist. Think “damp sponge,” not “swamp.”
- Check seams daily by hand, they are the first place to dry out and curl.
- Water lightly rather than heavily, since the roots aren’t deep enough yet to use a big soak.
- If afternoon temperatures climb into the 90s, add a short midday cycle just to knock the heat off the blades.
Days 8 through 14: fewer cycles, more depth
Drop to one or two waterings a day, but let each one run longer so water reaches 1.5 to 2 inches into the soil. This is also when the 30-day watering matrices that turf professionals use start calling for the first tug tests. Grab a handful of grass and pull gently. If it resists even a little, tiny root hairs are starting to anchor into your soil.
Days 15 through 21: chasing the roots down
Now you start training roots to grow deeper instead of staying lazy near the surface. Water every other day, or once daily if your soil drains fast, but make each session count: aim for 2 to 3 inches of total soil moisture per soak. This is where “watering less often but more thoroughly” starts to matter more than frequency.
A well-timed dry-down between waterings, sometimes called a deficit period, actually helps here. Letting the top layer dry out slightly forces roots to stretch downward looking for water, which builds a deeper, more drought-resistant root system. Push this too far, though, and you risk stressing the grass or opening seams back up, so err conservative if you’re not sure.
Days 22 through 30: settling into a real schedule
By the final week, most lawns can handle one or two deep waterings, working toward that 1 to 1.5 inch weekly total that established turf runs on for the rest of its life. Do a final tug test: real resistance, with the sod staying put and soil clinging to the roots, is your signal that establishment is complete and you can move to a normal irrigation schedule.
| Phase | Frequency | Moisture target | Key check |
|---|---|---|---|
| Day 0 | One deep soak | Top 2–3 in. wet | Lift corner, confirm dark soil |
| Days 1–7 | 2–3× daily | Top 0.5–1 in. moist | Hand-check seams |
| Days 8–14 | 1–2× daily | 1.5–2 in. deep | First tug test |
| Days 15–21 | Every other day to daily | 2–3 in. deep | Root resistance building |
| Days 22–30 | 1–2× weekly | 1–1.5 in. total/week | Final tug test |
How Do You Convert Watering Inches Into Sprinkler Run Times?
Sprinkler heads don’t apply water at the same rate, so “water for 20 minutes” means something completely different depending on what’s mounted on your risers. Figuring out your system’s precipitation rate is the only way to know if you’re actually delivering the inches your sod needs.
- Set out three or four straight-sided cans (tuna cans work fine, or a proper rain gauge) spread across one irrigation zone.
- Run that zone for exactly 15 minutes.
- Measure the water depth in each can with a ruler and average the readings.
- Multiply by four to get your precipitation rate in inches per hour. If your cans averaged a quarter inch after 15 minutes, your system applies 1 inch per hour.
- Divide your target inches by that hourly rate, then convert to minutes. Needing 0.5 inch at a 1 inch/hour rate means a 30 minute run.
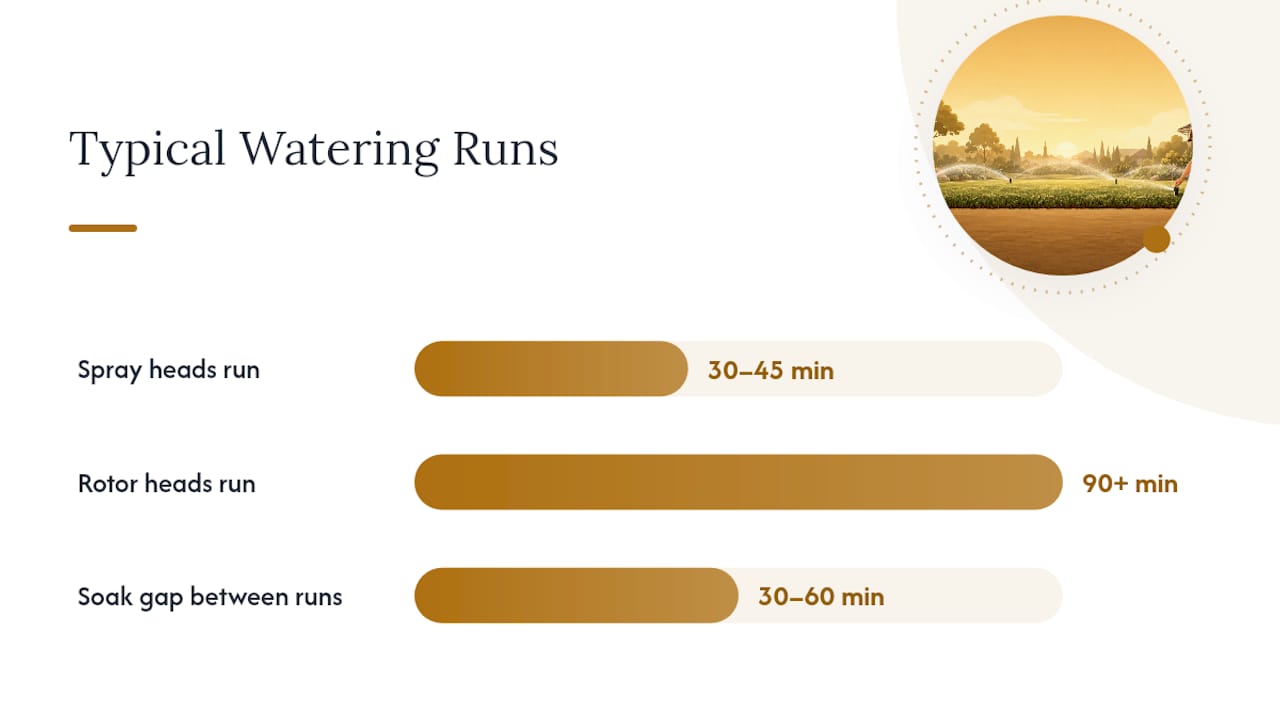
Head type changes everything here. Pop-up spray heads typically apply water at 1.0 to 1.5 inches per hour, fast enough that a day-one soak might only take 30 to 45 minutes. Rotor heads apply much slower, often 0.3 to 0.6 inches per hour, so hitting the same target can take 90 minutes or more.
That gap is exactly why cycle-and-soak programming matters, especially with spray heads on anything but flat sandy ground. Instead of running one long cycle, split the total time into two or three shorter runs with a 30 to 60 minute gap between them. Water soaks in during the gap instead of sheeting off the surface, which is the main cause of runoff on new sod.
Pro Tip: If you have sandy soil, water drains through so fast that you can often skip the soak gaps and just run slightly longer single cycles. Clay soil is the opposite: shorten each cycle and add an extra soak break, or you’ll see water pooling on top before it ever reaches the roots.
Adjusting the Schedule for Your Soil, Heat, and Slope
The 30-day schedule above assumes average conditions. Real yards rarely cooperate that neatly, so a few adjustments make the difference between sod that thrives and sod that struggles.
- Sandy soil drains fast and holds almost no moisture, so you may need an extra short cycle during week 1 and slightly longer runs throughout the month.
- Clay soil holds water near the surface and drains slowly, so stick to shorter, more frequent cycles even in later weeks to avoid waterlogging the root zone.
- Full sun and wind exposure dry sod out quickly during a heat wave; add a brief midday misting cycle in week one if blades look gray or curled by early afternoon.
- Shaded areas stay wet far longer after each watering, so cut frequency and never irrigate late in the evening, since standing moisture overnight in shade is a common trigger for fungal disease.
- Sloped yards lose water to runoff before it soaks in, so lean on cycle-and-soak and hand-water any seams near the top of the slope where water tends to run off before it can settle.
What Are the Signs of Overwatering or Underwatering New Sod?
Most sod problems trace back to one of two mistakes, and both are usually fixable if you catch them early.
Underwatering shows up as seams pulling apart, blades turning a dull gray-blue or curling inward, and footprints that stay pressed into the grass instead of springing back. The fix is straightforward: add a watering cycle and hand-water the seams and edges directly, since they dry out fastest.
Overwatering looks different: mushy, squishy turf, standing water, mushroom growth, and yellowing patches are the classic warning signs. If you see these, pause irrigation entirely for a day or two and check for drainage issues underneath. In persistently soggy spots, core aeration can help water and oxygen reach the root zone instead of sitting on top of it.
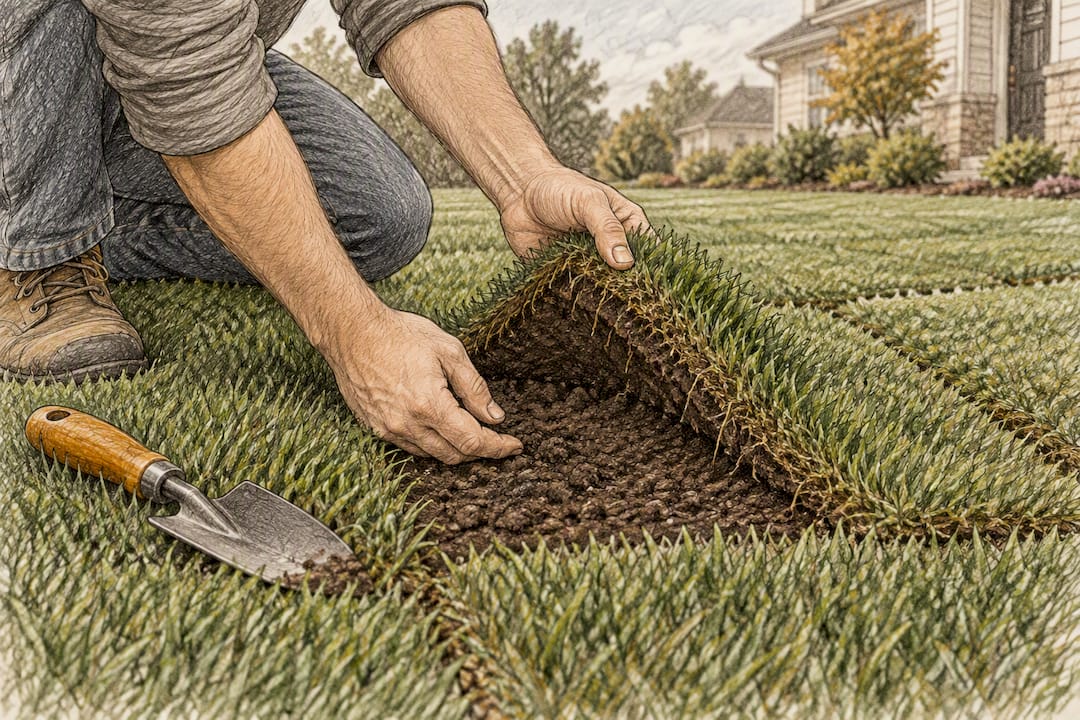
A quick way to tell which problem you’re dealing with: lift a corner of the sod. If the soil underneath is bone dry and crumbly, you’re under.watering. If it’s dark, slick, and smells sour or swampy, you’re overdoing it.
Not every yellow patch is a watering problem. If grass stays wet and yellow even after you cut back irrigation, or if you notice a distinct smell or thread-like fungal growth, that points toward disease rather than a simple moisture imbalance, and it’s worth getting a second opinion before adjusting your schedule further.
How Do You Check if New Sod Has Enough Water?
Three checks cover almost everything you need to know, and none of them require special equipment.
- Tug test: Grab a small patch of grass and pull upward gently. Early on, it lifts easily with no resistance. By week 2, you should feel slight resistance. By week 4, it should hold firm, a sign roots have knitted into the soil below.
- Lift-a-corner check: Gently peel back a corner of sod (only in an inconspicuous spot) and look at the soil interface. It should look dark and feel cool and moist, never bone dry or muddy.
- Moisture probe or screwdriver test: Push a long screwdriver straight down into the sod. It should slide in easily to about 1 inch deep in week 1, and 3 to 4 inches deep by weeks 3 and 4 as roots grow and soil structure improves.
Pro Tip: Keep a cheap moisture probe near your hose bib during the first month. A 30-second check before you head to work saves you from guessing whether last night’s watering actually reached the roots.
Why Roberto Trusts Hands-On Checks Over Guesswork
Sprinkler timers are a starting point, not a guarantee. Over years of installing sod across North Atlanta yards, the pattern that shows up again and again isn’t a bad watering schedule on paper. It’s sod that never got proper soil contact in the first place, so no amount of watering could save it.
Professional installers roll new sod after laying it to press out air pockets and press the roots against the soil, then tighten seams by hand so they don’t gap and dry out first. That single step, soil contact, matters as much as the watering schedule that follows it. If your yard has heavy clay, steep grading, or an irrigation system that’s clearly mismatched to your sprinkler heads, that’s usually the moment to bring in a professional rather than fight the schedule alone.
What the 30-Day Schedule Gets Right, and Where Homeowners Still Trip Up
The research on new sod watering agrees on more than it disagrees on: soak immediately, water often and shallow for a week, then taper toward deep and infrequent. Where most advice falls short is translating “inches of water” into something you can actually do with a garden hose or a sprinkler controller. Nobody times their showers in inches, and nobody should be expected to water their lawn that way either.
If you take one thing from this schedule, prioritize the tug test over the calendar. Calendars assume average weather, average soil, and an average sprinkler system. Your yard has none of those in the exact combination the schedule assumes. A yard with heavy clay might need three weeks to hit the resistance a sandy yard hits in ten days. Watch the grass, not the date on the schedule.
The most overrated piece of advice floating around is “just water it every day for a month.” That is how sod drowns in clay soil and dries out in sand, sometimes in the same yard, ten feet apart.
— Roberto
Get Sod Installed Right the First Time
Roberto’s Stump Grinding Services handles sod installation across North Atlanta the way it should be done: soil prepped, sod rolled tight against the ground for real contact, and seams closed so they don’t dry out and curl in week one. That soil contact step is exactly what determines whether a watering schedule like this one actually works or fights an uphill battle for a month.

Large yards, sloped lots, and heavy clay sites are where DIY installation and watering schedules run into the most trouble, simply because there’s more room for gaps, runoff, and uneven soil contact to sneak in. Some professional sod installers provide free on-site quotes within a few business days, carry insurance, and sometimes offer a satisfaction guarantee to address issues during the establishment period. If your project is in Alpharetta or Johns Creek, check the local sod installation pages for service details, or request a free quote to get your new lawn started on solid ground.
Sources
This schedule draws on USA Sod’s day-by-day watering guide, LawnsGuide’s 30-day rooting and establishment matrices, Sod Solutions’ timing and disease-risk guidance, and Woodlands Water’s overwatering diagnostics, among other turf-care resources cited throughout.
- How Often Should You Water New Sod? A Day-by-Day Schedule | USA Sod
- How to Care for New Sod: A 30-Day Watering & Rooting Guide | LawnsGuide
- Essential Watering Guide for New Sod
FAQ
How Long Do You Have to Water New Sod?
Plan on watering intensively for about 30 days total. The first week needs two to three short waterings daily, tapering to one or two deeper waterings by weeks 3 and 4 as roots establish and the lawn transitions to a normal weekly schedule.
Can You Overwater Newly Planted Sod?
Yes, and it’s just as damaging as letting it dry out. Mushy turf, standing water, and mushroom growth all signal overwatering, and the fix is pausing irrigation for a day or two and checking for drainage problems underneath.
Is 20 Minutes Enough Time to Water New Sod?
It depends entirely on your sprinkler type. A fast pop-up spray head applying over 1 inch per hour might deliver enough in 20 minutes, while a slower rotor head applying half an inch per hour could leave the soil far short of the moisture new sod needs.
What Should New Sod Look Like After One Week?
Healthy sod at one week looks green and tight to the ground, with seams still closed and no curling or gray-blue discoloration on the blades. A gentle tug test should show the very first signs of resistance as new roots begin anchoring into the soil below.
Recommended
Get a free in-person quote.
We come out, walk the property with you, and give you the number on the spot, free, no obligation, across 18 north Atlanta cities.
Call (770) 309-1050